Before painting, thorough surface preparation is essential for a high-quality finish. Begin by cleaning walls with a mild detergent, then repair any cracks or peeling with spackling or caulk and lightly sand the area. Always seek professional advice for significant repairs. After repairs set, clean the walls again to remove debris. This prep work creates an optimal surface for paint application, enhancing both durability and appearance. Use high-quality brushes or rollers, apply painter's tape for sharp edges, and protect floors with drop cloths or plastic sheeting. Choosing the right type of paint—latex for interiors, acrylic or oil for exteriors—and a suitable sheen level based on room usage is crucial. Invest in quality tools to avoid issues like lap marks or visible brush strokes. For interior walls with imperfections, use spackling compound or filler followed by sanding and priming before painting. Addressing peeling paint and minor cracks with careful removal of loose paint, sanding, and applying fresh paint ensures a long-lasting finish. Regular cleaning and prompt touch-ups are key to maintaining the appearance of painted surfaces, with consistent upkeep extending their life and keeping them looking fresh over time. Adhering to handyman tips for preparation and maintenance is vital for achieving and preserving an impeccable paint job.
Refresh your living spaces with a coat of fresh paint, bringing new life and vibrancy to any room. This article serves as a comprehensive guide for homeowners and handymen alike, offering a step-by-step approach to achieving a flawless finish. From meticulously preparing your workspace to selecting the most suitable paints and tools, we’ll cover everything you need to know for optimal results. Discover professional techniques for painting walls with a handyman’s precision, learn to identify and correct common wall imperfections, and gain expert tips for those final touches on trim, cabinets, and hardware. Additionally, we’ll explore how to maintain your paint job over time, ensuring your home remains a pristine reflection of your personal style.
- Preparing Your Space: Essential Steps for a Clean Canvas
- Selecting the Right Paint and Tools for Optimal Results
- Techniques for Flawless Wall Painting with a Handyman's Touch
- Identifying and Addressing Common Wall Imperfections
- Expert Tips for Finishing Touches: Trim, Cabinets, and Hardware
- Maintenance and Future Touch-ups: Keeping Your Paint Job Fresh Longer
Preparing Your Space: Essential Steps for a Clean Canvas

Before applying a fresh coat of paint, preparing your space is paramount for achieving a polished finish. Begin by thoroughly cleaning the walls with a mild detergent and water to remove any accumulated dust or grime. This ensures that the paint adheres properly to a clean surface, avoiding an uneven or textured look post-painting. Once the walls are spotless, repair any cracks, holes, or peeling areas using spackling compound or caulk. For more significant repairs, a handyman’s expertise might be necessary to ensure that these imperfections blend seamlessly with the surrounding paint. After the repairs have dried and been lightly sanded for a smooth finish, wipe down the walls again to remove any residual dust from the sanding process. This meticulous preparation lays the groundwork for a pristine canvas upon which your chosen colors can shine, making the final outcome both durable and visually appealing.
In addition to a clean surface, selecting the right tools and materials is essential. High-quality brushes or rollers will make a noticeable difference in the application of paint, as will using painter’s tape to create sharp lines and protect surfaces from accidental brush strokes. Handyman tips often emphasize the importance of using drop cloths or plastic sheeting to catch any drips or spills, preventing unsightly stains on your flooring. By taking these preparatory steps, you set the stage for a professional-looking finish that will transform any room with minimal effort and maximum impact.
Selecting the Right Paint and Tools for Optimal Results

When embarking on a painting project to refresh your space, selecting the appropriate paint and tools is paramount for achieving an immaculate finish. The right paint not only enhances the visual appeal of your surfaces but also ensures durability and longevity. Consider the type of paint that best suits your needs: latex-based paints are ideal for most interior walls due to their ease of application and clean-up, while exterior projects may benefit from acrylic or oil-based paints that offer superior protection against the elements.
Handyman Tips advise matching the sheen level of the paint to the room’s usage; flat or matte finishes are great for low-traffic areas as they hide imperfections well, whereas semi-gloss or high-gloss paints are more suitable for areas like kitchens and bathrooms where moisture and frequent cleaning are common. Additionally, invest in quality brushes and rollers; their superior construction will make the painting process smoother and yield better results. High-quality tools distribute paint more evenly and can prevent lap marks or unsightly brush strokes. Don’t forget to use painter’s tape to protect trim and molding, ensuring clean lines and a professional finish. By carefully selecting your paint and equipping yourself with the right tools, you’ll set the stage for a transformation that will breathe new life into your living spaces.
Techniques for Flawless Wall Painting with a Handyman's Touch

When revitalizing your walls, adopting precise techniques can make all the difference in achieving a flawless finish that stands the test of time. A handyman’s touch involves careful preparation and application to ensure every stroke of paint contributes to the overall perfection of the surface. Begin by thoroughly cleaning the walls with a mild detergent solution to remove any accumulated dust or grime, which can interfere with paint adhesion. Once the walls are clean, use fine-grit sandpaper to gently sand the surface, creating a uniform finish that will accept new coats of paint more effectively. This step is crucial for both latex and oil-based paints, as it helps achieve better paint coverage and durability.
After preparing the walls, select high-quality primer appropriate for your specific wall material. A primed surface not only enhances paint adhesion but also helps in hiding any irregularities on the wall. Apply the primer using a handyman’s preferred tool—a 9-inch roller frame with a nap that matches the texture of the primer and the walls. For edges and trim, use a 2- or 3-inch angled brush to ensure a smooth transition between surfaces. Once the primer is dry, choose your topcoat paint and follow similar application methods for even coverage. Handyman tips suggest using a separate roller cover for the topcoat to avoid contamination with any residual from the primer. Remember to apply multiple thin coats of paint instead of one thick layer to prevent drips and ensure an even finish. Let each coat dry completely before applying the next, as this allows the paint to cure properly and results in a longer-lasting, more uniform appearance. With these handyman techniques, your walls will exude a polished, well-maintained look that reflects careful attention to detail and superior craftsmanship.
Identifying and Addressing Common Wall Imperfections

When revitalizing your walls, it’s crucial to identify and address common wall imperfections for a polished finish. Dings, dents, and nail holes from previous art or fixtures can detract from the overall appearance of your space. A handyman tip for minor dings and dents is to use a spackling compound or filler to smooth out the surface, followed by a light sanding to create a seamless finish. For larger gaps or holes, a piece of cardboard or wood, cut to size, can serve as a backing before applying the filler, ensuring a secure and even repair. After the filler dries, apply a coat of primer and then match the wall color for a perfect blend that is virtually undetectable.
Another common issue is peeling or cracked paint, which can be unsightly and lead to further damage if not properly addressed. Begin by removing any loose or peeling paint with a putty knife or a scraper, being careful not to gouge the surrounding area. Once the area is clean, lightly sand it to ensure a smooth surface for painting. If the crack is fine, you can use a fine-tipped artist’s brush to apply a fresh coat of paint; this handyman trick offers precision and control, minimizing the risk of overspray or incorrect color application. For larger cracks, a small amount of caulk applied along the crack and then painted over will restore the wall’s integrity and appearance. These handyman tips can transform even the most worn walls into a fresh canvas for your home.
Expert Tips for Finishing Touches: Trim, Cabinets, and Hardware

When aiming to give your living space a fresh, polished look, the finishing touches on elements like trim, cabinets, and hardware can significantly elevate the overall aesthetic. Handyman tips often emphasize the importance of meticulous attention to detail in these areas. For instance, cleaning or repainting the trim work in a room not only refreshes its appearance but also defines the boundaries of each space effectively. Use a soft-bristled brush or a sponge to gently remove any accumulated dust or grime, ensuring a smooth finish before applying a fresh coat of paint. Select a color that complements your walls and furniture for a cohesive look.
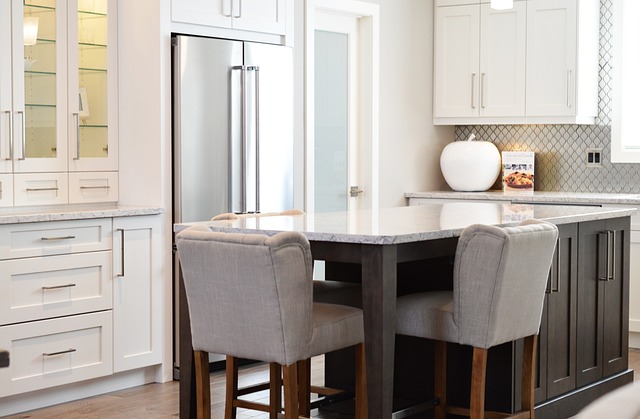
Cabinets are another focal point that can transform with the right touch-up. Begin by thoroughly cleaning the surfaces to assess their condition. If they’re in good shape, a simple cleaning might suffice. For a more dramatic transformation, consider a fresh coat of paint or stain, depending on your desired finish. Replacing or upgrading hardware such as handles and knobs can modernize cabinets instantly. Handyman experts suggest using a consistent style throughout the home to maintain a uniform appearance. Choose hardware that contrasts nicely with the cabinet color, and consider the overall design theme of your home when making your selection. With these handyman tips, even small adjustments to trim, cabinets, and hardware can make a significant impact, giving your space a fresh, polished look that is both inviting and well-maintained.
Maintenance and Future Touch-ups: Keeping Your Paint Job Fresh Longer

Regular maintenance and thoughtful touch-ups are key to preserving the fresh appearance of a newly painted surface. To extend the longevity of your paint job, it’s important to address any signs of wear early on. Dust, grime, and moisture can all take their toll over time, but with handyman tips, you can mitigate their effects. For instance, cleaning the area regularly with a mild detergent will prevent dirt buildup, which can etch into the paint and cause damage. In addition to cleanliness, touching up minor imperfections as they occur prevents them from becoming larger issues. Small nicks or scratches should be filled and repainted promptly to maintain the integrity of the finish. Using a color-matched touch-up paint can blend these repairs seamlessly into the existing surface. Moreover, when it comes time for more extensive work, remember that proper preparation is paramount. Remove old, peeling paint, smooth rough edges, and thoroughly clean the surface before applying fresh coats. This meticulous approach ensures a durable, attractive finish that will maintain its appeal for years to come. With these handyman tips in mind, your paint job won’t just look fresh; it will stay that way.
Refreshing your living space can significantly enhance its ambiance. By meticulously preparing your environment, choosing quality paint and tools, employing expert painting techniques, and addressing wall imperfections with a handyman’s precision, you’ll achieve a flawless finish. Complement this with professional tips for perfecting the trim, cabinets, and hardware to ensure a cohesive and polished look. Remember, maintaining your fresh paint job is key to its longevity. Adopting these handyman tips will not only transform your space but also keep it looking pristine for years to come.